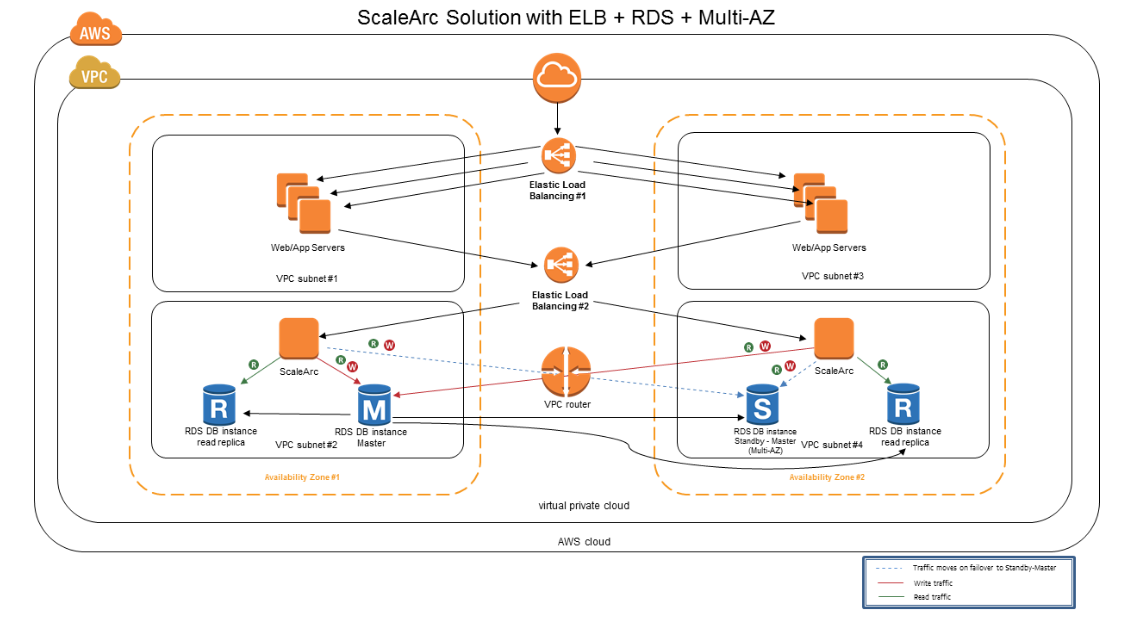
Elastic Load Balancing (ELB) automatically distributes incoming application traffic across multiple Amazon EC2 instance in the cloud. It enables you to achieve greater levels of fault tolerance in your applications by continuously monitoring the health of the registered instances, seamlessly providing the required amount of load-balancing capacity needed to distribute application traffic in multiple Availability Zones.
Configuring Active/Active ScaleArc on AWS requires an ELB to be configured to load balance the traffic between the two ScaleArc systems.

Prerequisites
You need the following to get started:
- An AWS account; alternatively, sign up at http://aws.amazon.com/
- Shared ScaleArc AMI image.
Configure an AWS ELB
Follow these steps:
Create an ELB
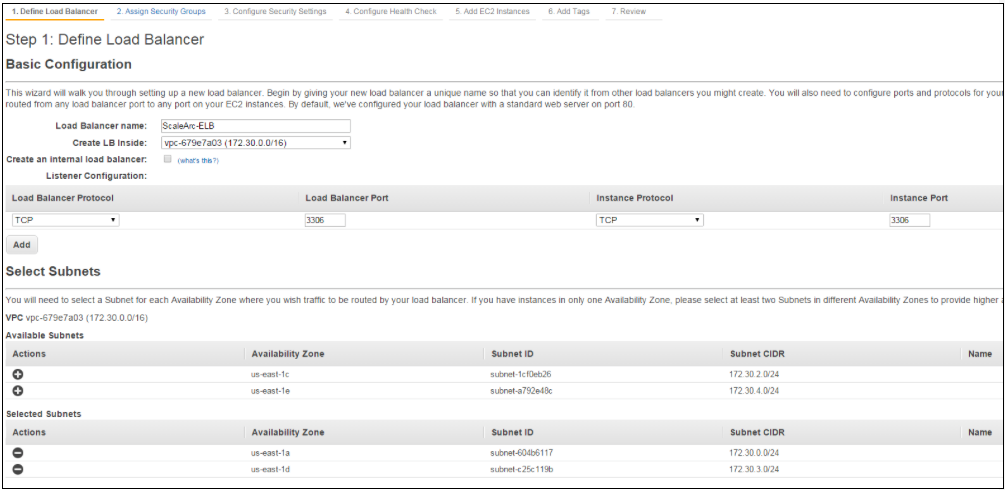
- Click Load Balancers > Create Load Balancer.

- Name the load balancer,.
- Choose the VPC if necessary, add the TCP listing port (3306,443,1521, and so on).
Set up Availability zone
- Select the Availability zone subnets to be load-balanced (these should be the same zones as the ScaleArc instances).
- Add to the appropriate Security Group.
Configure health check
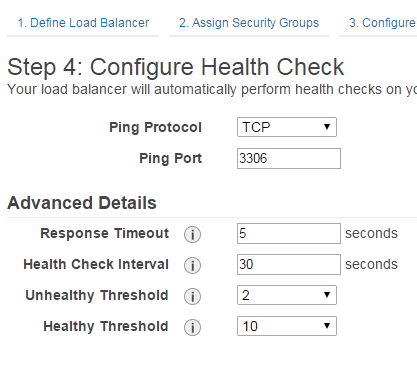
The health check occurs on the instances being load balanced. In the ELB configuration, the system checks that the protocol and port are open and available to determine instance status. Be careful, you can only have one health check per ELB. If you have multiple ScaleArc clusters, all services become unavailable if the first health check starts to fail.
- On the Load Balancer screen, click Configure Health Check (#4).

- Add your instances to be load balanced to the ELB.
Log in to ScaleArc
You are now ready to log in to ScaleArc.

Comments