
Prerequisites
Make sure you have the following prerequisites to successfully deploy ScaleArc in a Windows Hyper-V environment:
- A download of the ScaleArc GA software release in ISO format
- A Windows 2012 Hyper-V environment containing one or more servers, with 16GB of RAM and 8 virtual CPUs available
- Local or shared storage with at least 100 GB for the operating system and 2TB of available space for logs
- Note that your environment view may differ slightly from the screenshots included in this section.
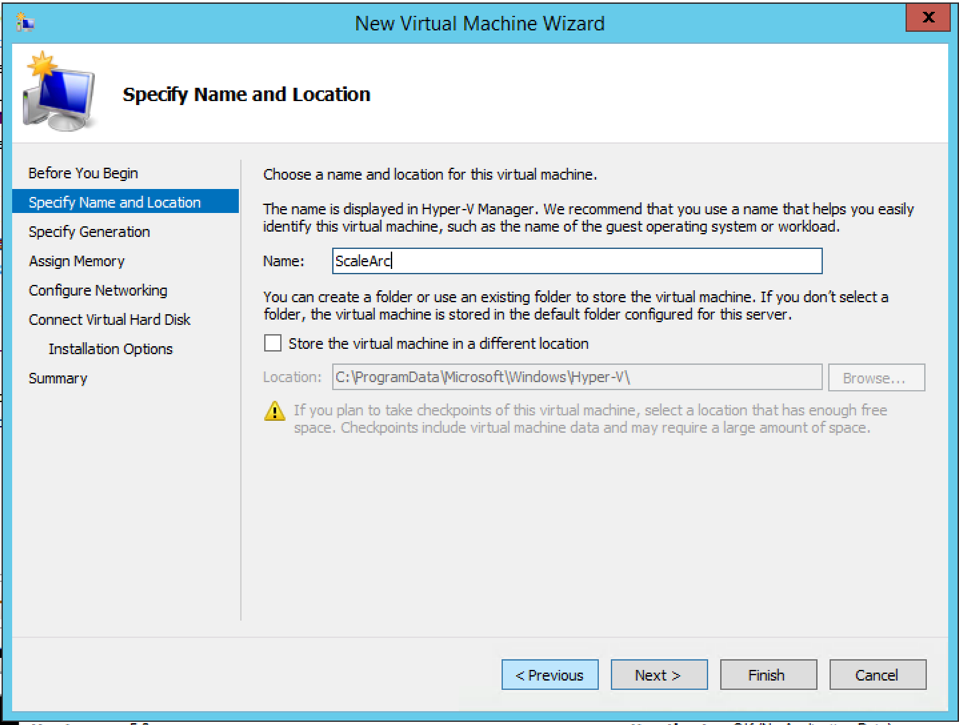
Create a virtual machine
Use the Hyper-V Manager to create a new virtual machine:
Right click on the physical server in the left panel where you want to create your virtual machine. From the right-click menu select New and then Virtual Machine.

- The New Virtual Machine Wizard appears. Click on Next to continue.

- Choose a name for the virtual machine and the location to store your virtual machine configuration files. Then, click Next.
- Choose the generation of this virtual machine and click on Next.

- Configure the amount of memory you wish to allocate for your virtual machine. The recommended minimum memory is 16GB. Click Next to continue.

- Choose the virtual network adaptor you wish to configure for this virtual machine. Select the appropriate connection for virtual switch and click Next.

- Create a Virtual Hard Disk. Refer to ScaleArc Sizing for details. Click Next.

- Browse for the installation media for your Virtual Machine OS, and click Next.

- Review the settings for the new virtual machine. Click on Finish to create the virtual machine and close the wizard.

Configure the virtual machine
Configure the VM to meet the minimum ScaleArc system requirements.
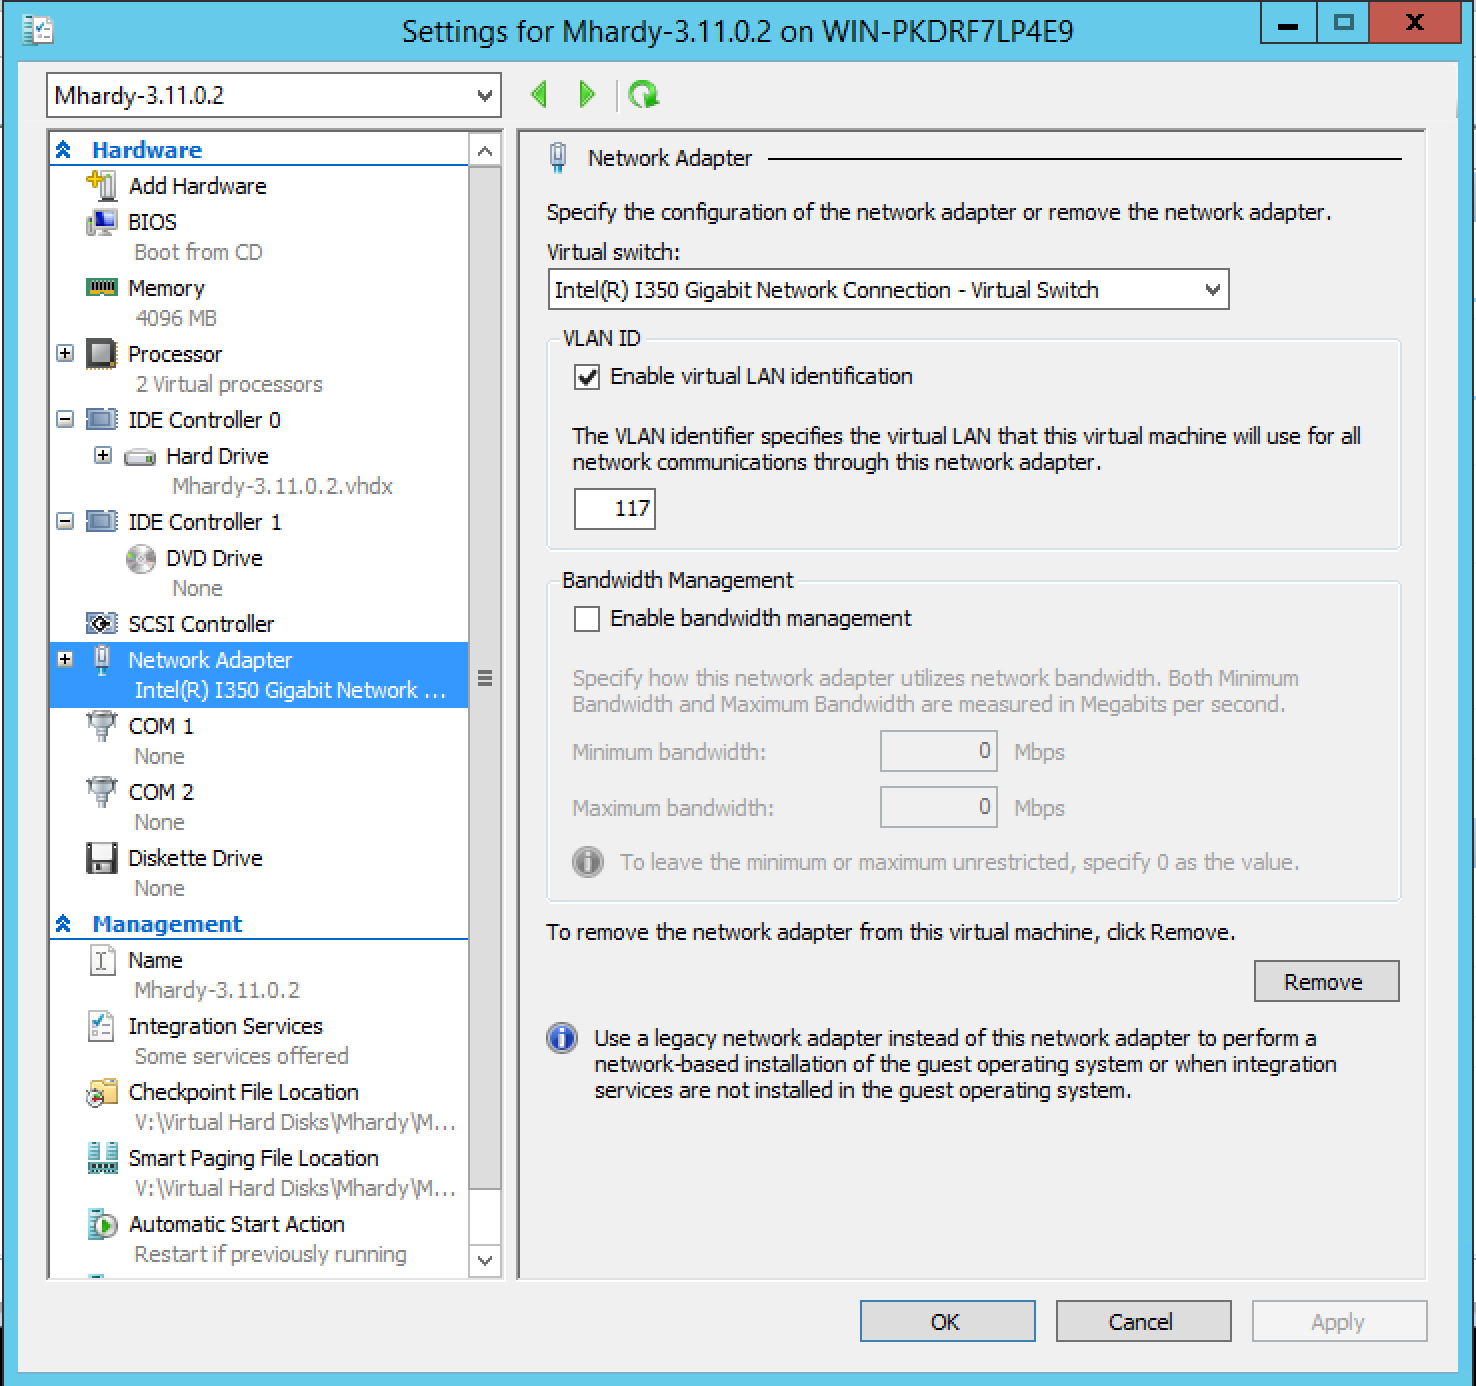
- Right-click on the newly-created VM from the Hyper-V Manager and click on Settings.

Click on Processor under Hardware to change the number of virtual processors to eight. Click Apply.

- If you need to configure VLAN setting for your network, select Network Adapter in the left panel and select the checkbox for Enable Virtual LAN identification. Then, enter the VLAN ID.
- Power on the virtual machine.
Install ScaleArc on Hyper-V
- In Hyper-V Manager, right click on the virtual machine and click on Connect to power on the virtual machine and start the installation.

- Select the Install ScaleArc option on the Welcome to ScaleArc Installer screen. Hit Enter.

Log in to ScaleArc
If you have successfully installed ScaleArc, on restart the screen displays a login prompt. This is the first time you are logging in to the ScaleArc system.
- Log in using the following credentials:
Username: admin
Password : admin@123
- Select option 1 to change IP/Gateway/Subnet.

- Enter the IP address, gateway, and subnet. Enter 1 to apply settings.

- Once the network is set, use the same IP address in your browser to see the ScaleArc user interface. If you have any trouble accessing the ScaleArc user interface make sure you have secured the network cabling and the switch/router configuration is in place.
- By default, ScaleArc uses a self-signed certificate for communication via HTTPS. Since it is self-signed, the screen displays an untrusted certificate alert while accessing ScaleArc.
- A successful network setup brings up the Welcome screen.

- Follow these steps to add MAC address anonymity. We recommend these steps for all ScaleArc virtual machines to ensure that when they are brought up, their MAC address does not change:
- SSH to the ScaleArc console. (Refer to https://support.scalearc.com/kb/articles/2201 for details.)
Run the following command, using a vi editor:
sudo vi /etc/sysconfig/network-scripts/ifcfg-eth0- Delete the following lines entirely from the file:
- NM_CONTROLLED
- HWADDR
- UUID
- TYPE
Make sure your file contains only these settings:
Device="eth0"
BOOTPROTO=static
IPADDR=<your ipaddr>
NETMASK=<your netmask>
ONBOOT=yes
- Delete the following lines entirely from the file:
- Save and quit by first entering a colon (:), then wq, so :wq
Run the following command:
rm /etc/udev/rules.d/70-persistent-net.rulesRestart the VM.
You are ready to initialize ScaleArc.
Migrating ScaleArc appliances
ScaleArc does not recommend or support voluntary or automatic Live Migration of an active (that is, HA Primary or standalone ScaleArc) appliance from one Hyper-V server to another. Testing shows that the migration process results in lost database updates, application server errors, and potentially-corrupted database records. Live Migration is not fast enough to support real-time operations that ScaleArc counts on.
ScaleArc supports cold migration. First, the ScaleArc appliance should be shut down before you begin the migration. Next, you need to configure static MAC addresses and ScaleArc's virtual NICs in a Static IP Pool. Additionally, virtual switches must be configured to both accept and propagate ARP updates or the appliance may not be accessible from the network, following migration. Note that this configuration is not available in Hyper-V Manager; it can only be completed through Microsoft System Center's Virtual Machine Manager, SCVMM. For details on configuring both the network interfaces and the virtual switches, see KB article 4066 on ScaleArc's Customer Support web site.
Linux-based operating systems such as ScaleArc's base OS use udev rules to associate logical device names for network interfaces (that is, eth0) with physical device names or UUIDs (which translate to MAC addresses). During the migration of a virtual machine from one Hyper-V server to another, the new Hyper-V server, when it is configured by default, changes the MAC address of the Ethernet interface to a new randomly-generated address. This prompts the Linux operating system to ignore the network interface, which fails to restart along with the virtual machine following a migration, resulting in the ScaleArc appliance becoming incapable of communicating on the network. You can avoid this problem by assigning a static MAC address to the network interface.
If you have configured ScaleArc for HA, the HA Secondary may be Live Migrated, provided you have configured Static MAC and Static IP and the virtual switches accept and propagate routing/forwarding ARP updates.To move both members of an HA pair, move the HA Secondary, perform a manual HA switchover, then move the newly-demoted HA Secondary.
For best survivability in the event of system or network failures, ScaleArc recommends you separate the two appliances of an HA pair onto two Hyper-V servers. In case of a failure, rather than attempting to move the HA Primary off of a failing Hyper-V server, perform an HA switchover from the GUI of the HA Secondary, then attempt to shut down the newly demoted HA Secondary on the failing Hyper-V server. Before bringing up the appliance that was running on the failed Hyper-V server, contact ScaleArc Support for assistance to avoid problems. In an emergency, the HA Secondary detects failure of the HA Primary and takes over the traffic.This happens much faster than a Live Migration.
Should you encounter an emergency on a Hyper-V server running a standalone ScaleArc you have little choice but to attempt a Live Migration. In this case, contact ScaleArc Support to assist you in recovery immediately. Make sure you immediately collect a log dump using the instructions in KB article 2736; use the --date syntax, with no hour specified. The logs should be collected within an hour of the problem to ensure the best assistance by avoiding log rollover; so don't delay. Contact us on our 24x7 toll-free support hotline, listed at support.scalearc.com.
Comments