
Follow these procedures to set up a Kerberized ScaleArc cluster:
Configure a hostname and VIP
Kerberos authentication uses hostnames to identify machines and services in the domain. This requires a valid and unique hostname for the VIP on the ScaleArc machine.
Create a hostname (DNS setup)
Follow these steps:
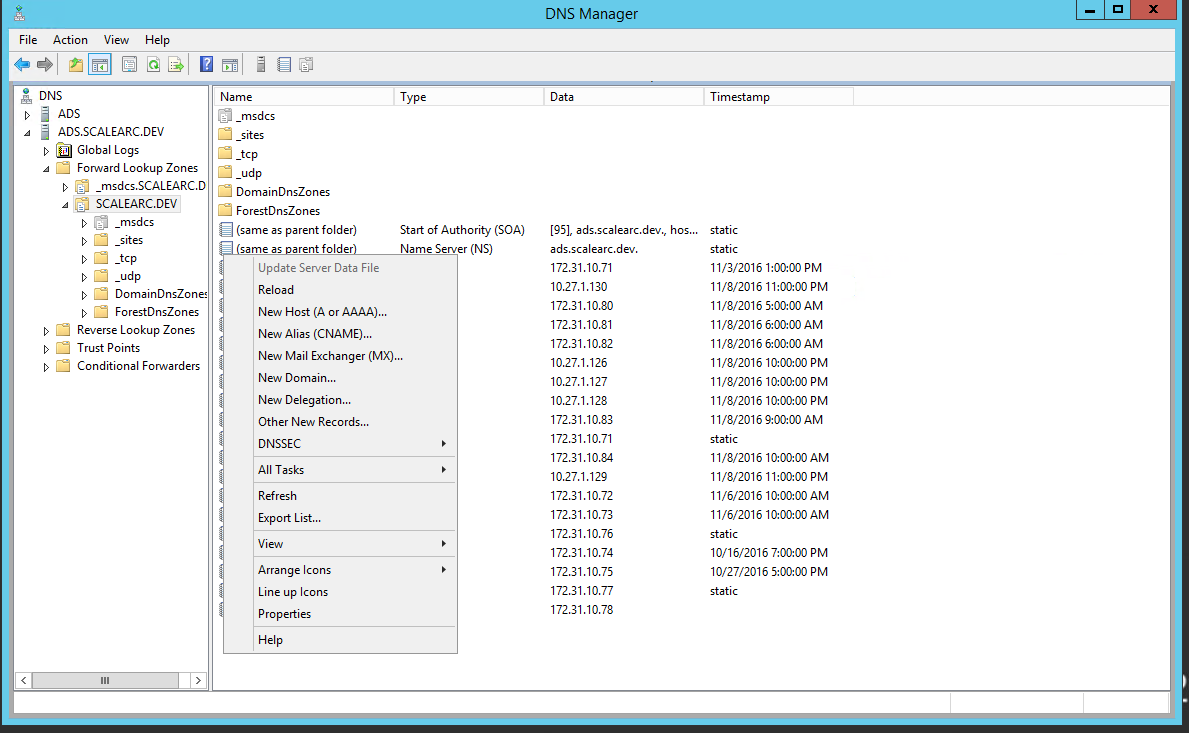
- Open DNS manager on the AD server.
- Navigate to the domain name, and right click it.
- Select New Host from the drop down menu.
Enter a new hostname; for example, scale-test. The FQDN for the record appears in the field.
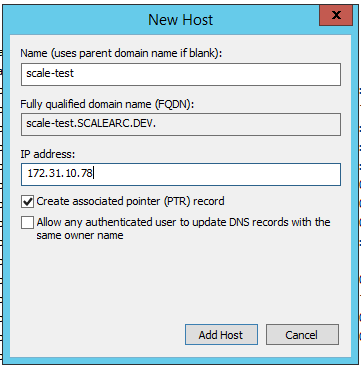
- Next, enter the IP address associated with the hostname.
- Select "Create associated pointer (PTR) record". This creates a reverse name lookup record for the host.
- Click Add Host. At this time you should have both the forward and reverse lookup for the virtual IP set to hostname scale-test.
Configure VIP for Kerberos
This example configures a VIP for the Kerberized cluster.
Follow these steps:
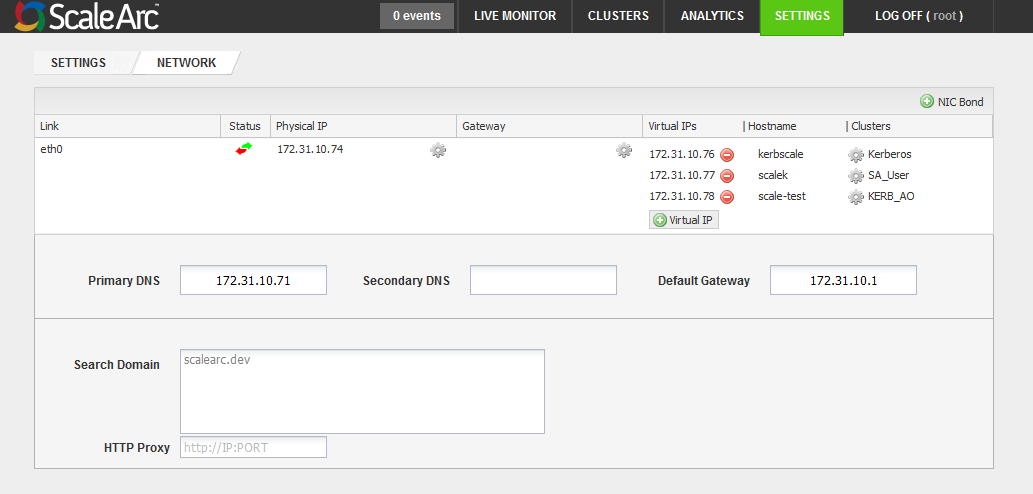
- Click the Settings tab > Network Settings on the ScaleArc dashboard.
- Click Virtual IP.
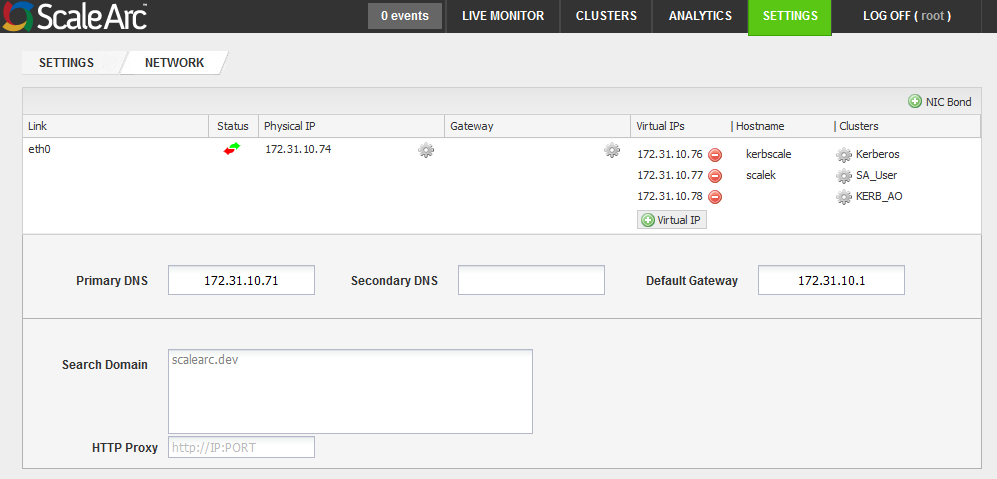
- Select a subnet mask.
- Enter the hostname that you created.
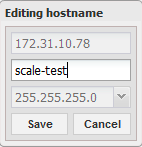
- Click Save.
- The address now appears on the screen.
Configure Windows AD for delegation
ScaleArc supports constrained delegation in which a user's identity and credentials are passed along to explicitly-specified servers or services.
Prerequisites
To configure ScaleArc to use constrained delegation, make sure you have the following:
- Set the NTP server in ScaleArc to the one set on the Active Directory server of the KDC. It is advisable to set maximum tolerance for computer clock synchronization to a value of five minutes.
- You have domain administrator account privileges.
- Ensure that forward and reverse DNS lookup zones are configured correctly for SQL server and ScaleArc (all virtual IP's).
Check the DNS server, it should be the same as the one configured in Active Directory or the authentication server in the Kerberos environment (KDC). Note that ScaleArc's hostname should be in lower case without any special characters, such as underscore or period.
Join ScaleArc as a machine account
Follow these steps to join ScaleArc as a machine account:
- Click the Settings tab > System Settings on the ScaleArc dashboard.
- Click the Windows AD Setup tab.
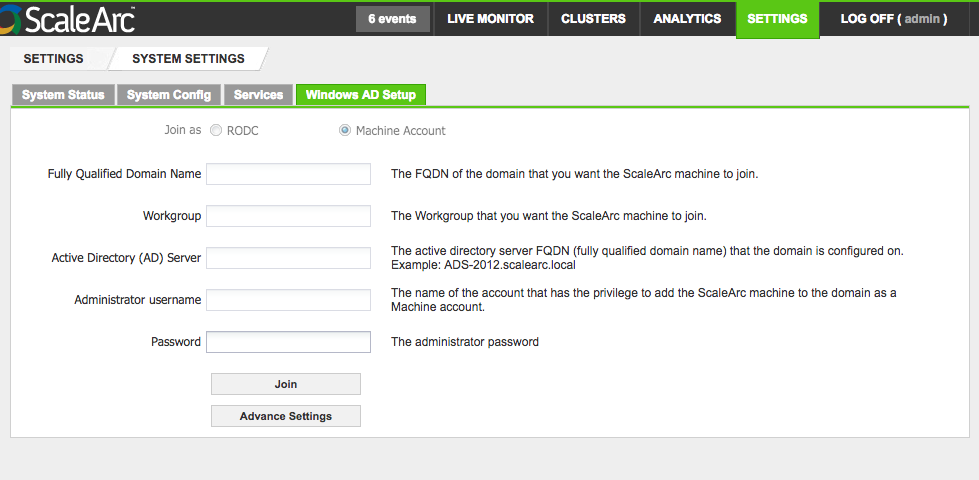
Select Machine Account. Then, complete the fields as follows:
Field Description Default/User input Fully Qualified Domain Name (FQDN) The FQDN of the domain that you want the ScaleArc appliance to join.
Enter an appropriate domain name. Workgroup The workgroup (Domain Netbios Name) that you want the ScaleArc appliance to join.
Enter a valid workgoup name. Active Directory (AD) Server
The active directory server FQDN (fully qualified domain name) that the domain is configured on. Note that the server name should not include a trailing dot (".") at the end, unless you are using a valid DNS entry for the name. Enter the FQDN. Administrative username The username of the account that has the privilege to add the ScaleArc appliance to the domain as a machine account.
Enter the username. Password The administrator password.
Enter the password. Advanced Settings The button to launch a screen for additional configurations. This setting appears only after you join. Click to open the related screen. - Click Join to complete the set up. A successful join posts this dialog box. Click OK. Once connected, you can use Unjoin to leave the domain.

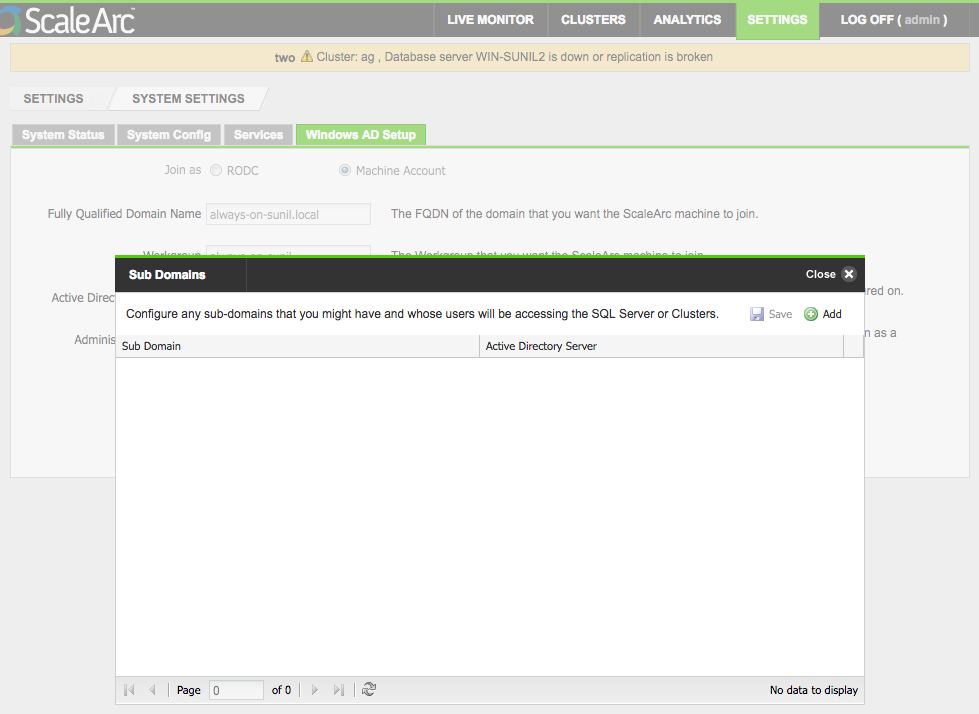
- Click Advanced Settings if you wish to add sub-domains. This is an optional setting.
- Enter one or more sub-domains and their corresponding AD servers. Click Add.
The ScaleArc appliance shows up in the Active Directory Users and Computers console. This creates a machine account for the ScaleArc appliance, using the naming convention <hostname$>.
Set up Service Principal Name (SPN) for ScaleArc
Next, set up SPN for ScaleArc. SPN is a unique identifier for a service on a network that uses Kerberos authentication. It consists of a service class, a host name, and a port. To create an SPN, use the SetSPN command line utility.
From the power shell, set up the Service Principal Name for ScaleArc on AD:
- Log into the Active Directory server as a user with domain administrator's privileges.
From the power shell, set the service principal name for ScaleArc on AD. Remember to specify the port correctly. In this example, the cluster listens on port 1433.
For standalone serverSyntax Setspn -A MSSQLSvc/<VIP_Hostname>.<domainname>:<port> <domain\ScaleArc hostname$> Example C:\>setspn -A MSSQLSvc/scale-test.krbs.com:1433 krbs\scale-pri$For AG ListenerSyntax Setspn -A MSSQLSvc/<VIP_Hostname>.<domainname>:<port> <domain\ScaleArc hostname$> Example C:\>setspn -A MSSQLSvc/scale-test.krbs.com:1433 krbs\scale-pri$ Syntax for AG Listener Setspn -A MSSQLSvc/<AG LISTENER_Hostname>.<domainname>:<port><domain\domain admin user> Example C:\>setspn -A MSSQLSvc/aglsnr.krbs.com:1433 krbs\cls
Set up ScaleArc for delegation
- On the domain controller, access the Active Directory Users and Computers console.
- In the console tree, under Domain name, click Computers.
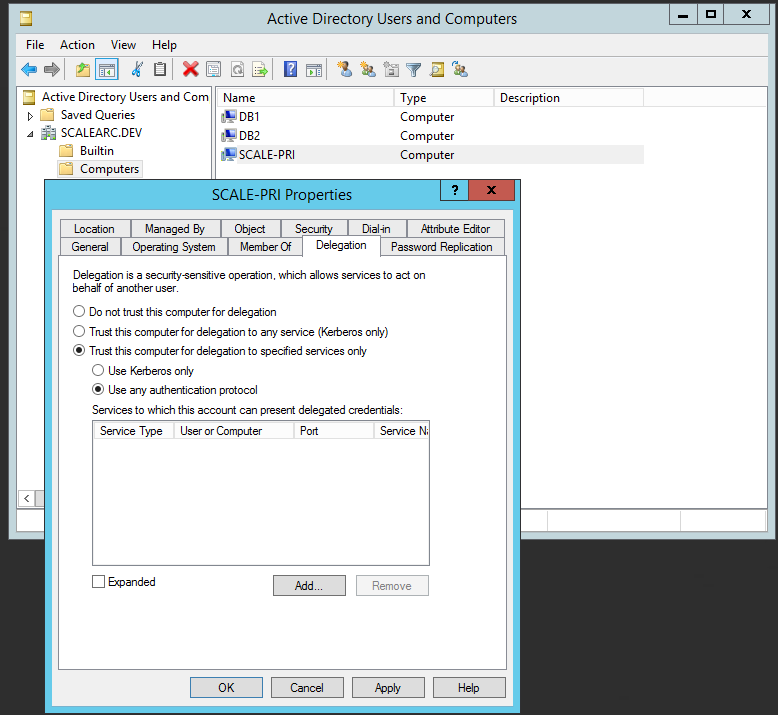
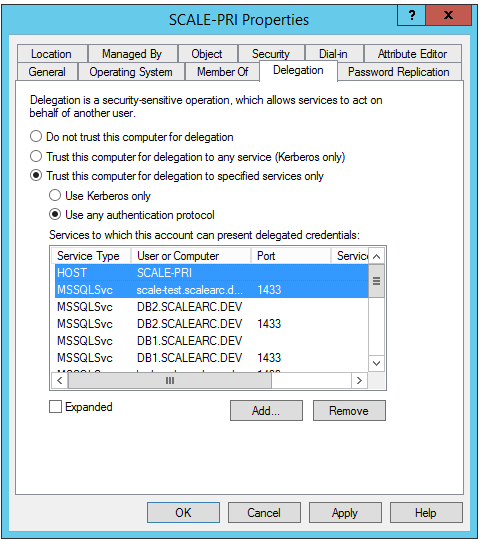
- Right-click the ScaleArc server, and then click Properties.
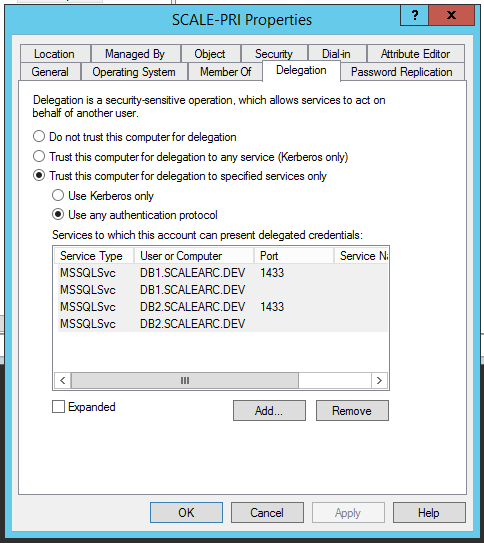
- On the Delegation tab, click Trust this computer for delegation to specified services only.
- Click Use any authentication protocol.
Click Add, and then click Users and Computers.
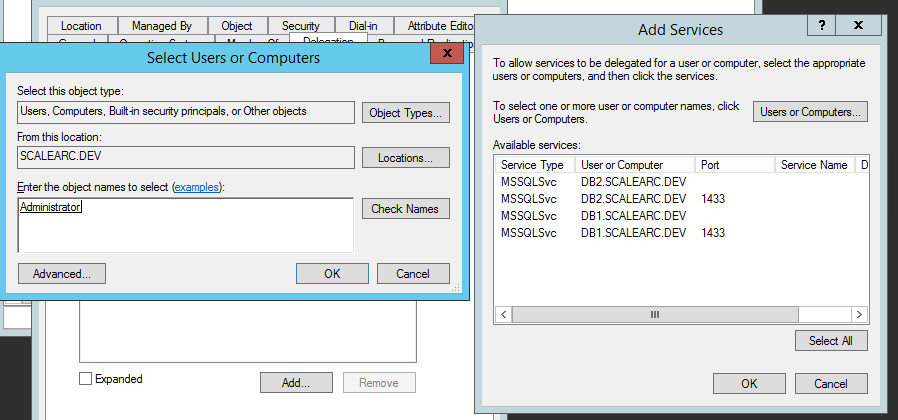
Enter the domain user that has the necessary credentials to start and stop SQL services; then, click Select All and OK.
- This step is optional for setting up a Kerberos cluster.
From the Delegation tab, click Add. Then, click Users or Computers and enter the machine account name of the ScaleArc primary machine (for example, scale-pri$). Click Check Names and OK.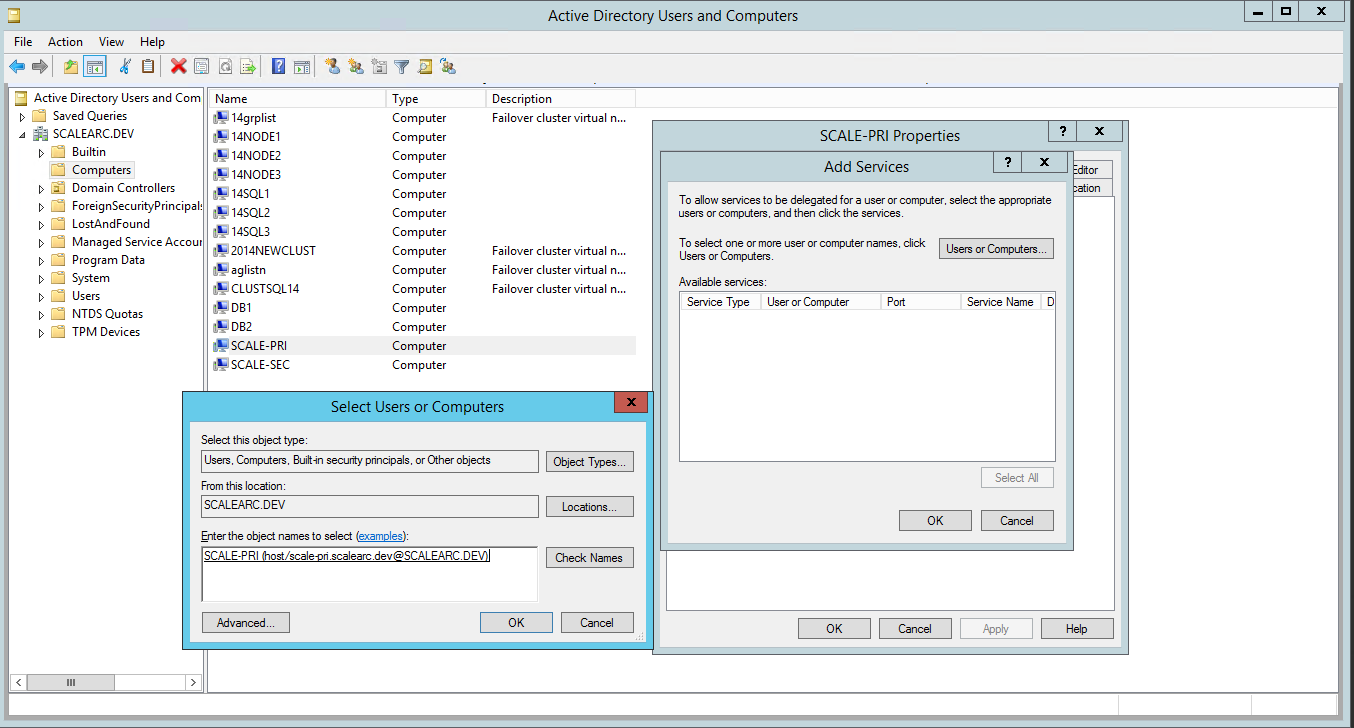
- This step is optional for setting up a Kerberos cluster.
Select the HOST and the MSSQLSvc service for the VIP created earlier. Press the Control key to select multiple entries. Click OK.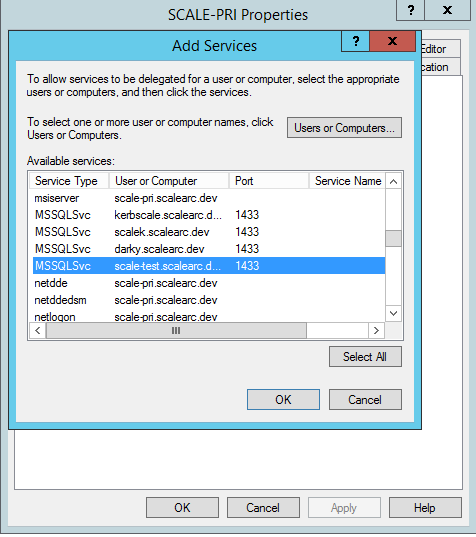
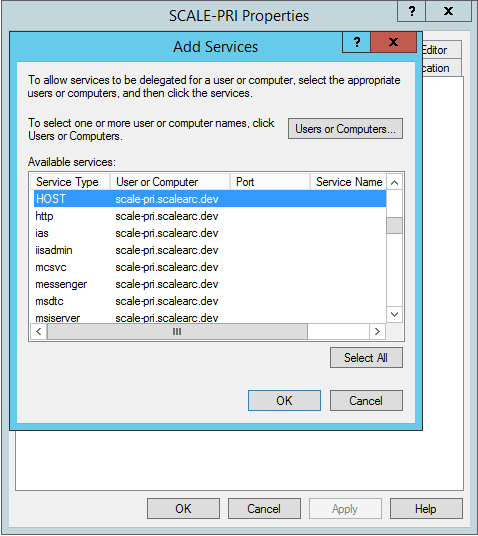
- The entries appear on the Delegation tab. Click Ok.
Provide database access
This is a two-step process:
- Set up SQL Server for authentication with the ScaleArc's machine account
- Configure database access
Grant access to ScaleArc's machine account
Follow these steps to grant minimum privileges to ScaleArc on SQL Server:
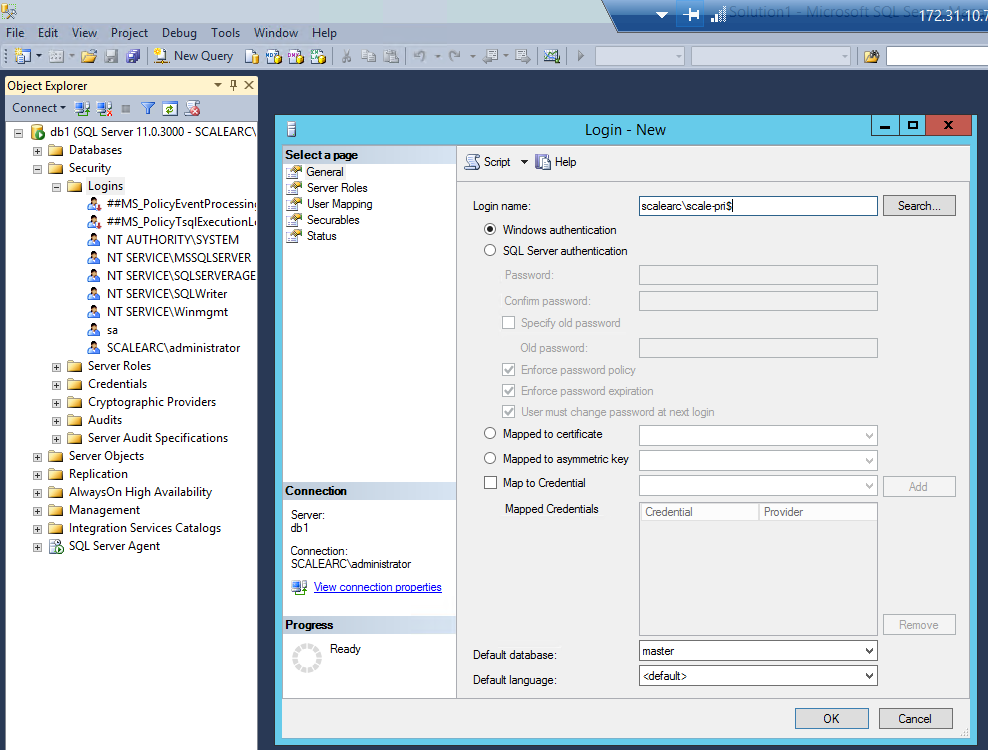
- From the machine running SQL Server, log in to SQL Management studio.
- Connect to the server.
- Log in.
Locate Security > Logins > New Login. Remember to add $ at the end of the login name.
- Select the user. Right-click on properties.

- Under the Explicit tab, select the following permissions.
- View Any Definition.
- View Server status.
- Click OK.
Create a cluster
You are now ready to create a Kerberized cluster in ScaleArc.
Define a cluster for Kerberos
Follow these steps:
- On the ScaleArc dashboard, click the Clusters tab > Add Cluster button.
- Locate the Network section. This is the first panel on the Create Cluster screen.

- Fill in the fields with valid information
Select the VIP address you created with the hostname for the field labeled Cluster Virtual IP Address.
Configure database access
Follow these steps:
- On the ScaleArc dashboard, click the Clusters tab > Add Cluster button.
- Locate the Database Access section. This is the second panel on the Create Cluster screen.

Configure the fields as follows:
Field/ButtonDescriptionDefault/User inputUse Kerberos authentication for ScaleArc administration Ensures that the entire cluster is running in a complete, Kerberos-authenticated mode. Note that when you select this option you do not need to enter username and password. Make sure you have set up minimum database privileges.
This option is pre-selected if you have configured ScaleArc to join the domain as a machine account. Start Cluster After Setup Determines if the cluster automatically goes live, following setup. A selected checkbox results in a live cluster at setup. When deselected, you need to start the cluster manually. Default: Checkbox is pre-selected.
Select/Deselect checkbox.- Next, configure SSL (optional) and and database servers for the cluster.
Verify Kerberos Authentication Offload
A fully-Kerberized cluster has the Kerberized Authentication Offload button set to ON when ScaleArc joins AD as a machine account and the Database Access option for Kerberos is pre-selected. Click here to review ScaleArc settings for Kerberos.
- Click Clusters > Status > Cluster Settings in the ScaleArc dashboard.
- Select the ScaleArc tab.
- Locate the Kerberos Authentication Offload button. Note that it is ON.
Comments