
ScaleArc recommends a High Availability (HA) deployment of two ScaleArc appliances in order to provide uninterrupted operation. Configure one of the appliances in the pair as the primary node and the other as the secondary node. The primary node accepts connections and manages servers while the secondary node monitors the primary. In case the primary is unable to accept connections, the secondary node takes over.
This section describes how to configure high availability for ScaleArc. ScaleArc uses the Pacemaker module from clusterlabs.org to setup high availability and supports active-passive peer configuration, with active resource sync between two nodes, virtual IP migration and node failure detection.
Prerequisites
Before you begin, ensure the following:
- Both ScaleArc systems have the same hardware/VM configuration.
- Both ScaleArc systems have the same license parameters.
- Each ScaleArc appliance has a unique license key.
- Configure virtual IP (VIP) prior to configuring HA.
- The network configuration on both the ScaleArc systems should be similar. This will ensure that whenever a HA switchover occurs, the other node is able to host all VIPs and handle all network communication.
Add a secondary node
The following section guides you to add a secondary ScaleArc appliance to a standalone primary ScaleArc appliance.
Click the Settings tab > HA Settings on the ScaleArc dashboard for the the primary unit in the HA pair.
Enter as follows:
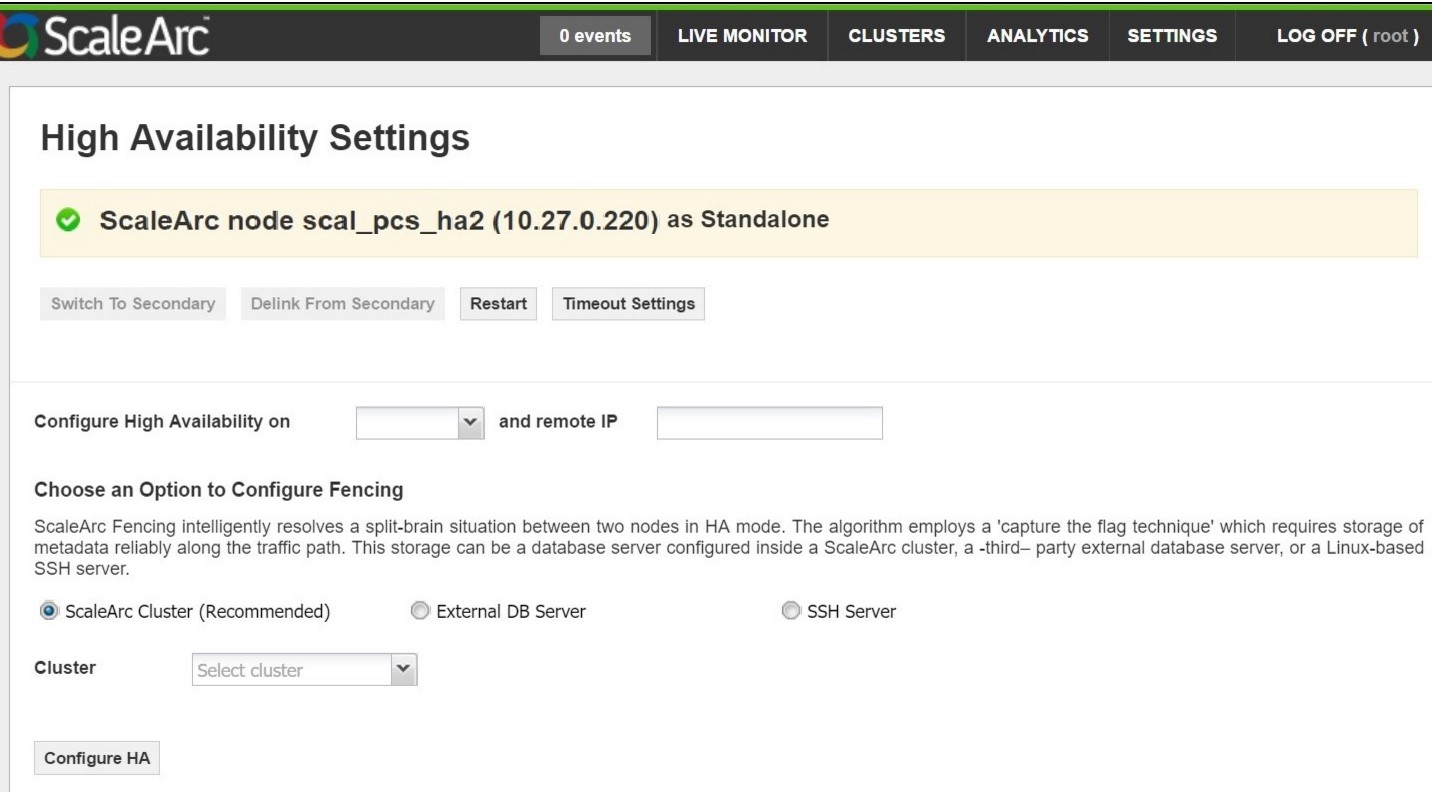
Field/Button Description Default/User input Configure High Availability on The drop down list of the active network interfaces associated with the ScaleArc appliance. Refer the chart labeled Local Network Settings at the end of the screen to view the available network interfaces. Select a network interface. IP address The remote IP address for the selected network interface. Enter a remote IP address. Select a fencing option. The fencing device is a component of a ScaleArc high availability cluster that monitors and cuts off access to a resource (VIP’s, core engine) from a node in the cluster if it loses contact with the rest of the nodes in the cluster. If you selected the recommended fencing option:
Field/Button Description Default/User input ScaleArc cluster (Recommended) ScaleArc uses the Read/Write server in the selected cluster to store fencing information. This choice creates a new, logical database on the server. We recommended this approach as it is in line with the traffic flow and helps resolve a split-brain situation accurately. Select this radio button. Cluster A drop down of clusters on the ScaleArc appliance. Select the cluster from the drop down. If you selected the external database as a fencing option, complete as follows:
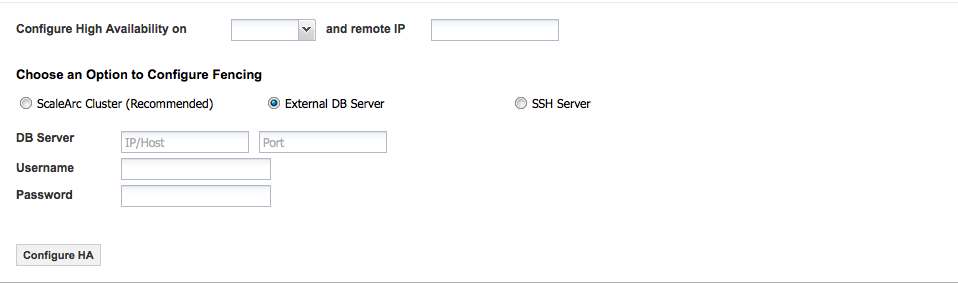
Field/Button Description Default/User input External DB Server An external database server (that is not part of any ScaleArc cluster) to store its fencing information. A new logical database is created on this database server to store the fencing information. Select this radio button. DB Server Requires an IP address/Hostname for for the selected database server. Enter the database IP/Hostname. Port The server's port. Enter a port number. Username The username to authenticate the external database server. Enter the username. Password The password to authenticate the external database server. Enter the password. If you selected the SSH fencing option, complete as follows:
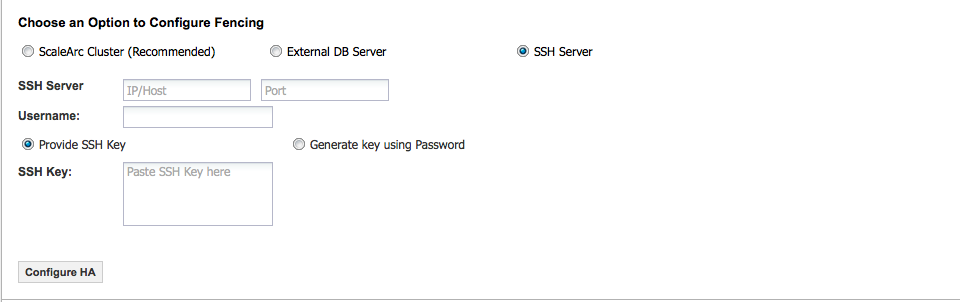
Field/Button Description Default/User input SSH Server A SSH access to any Linux based server to store fencing information. This information is stored in files and does not require privileges on the SSH server. 1 Select this radio button. 2 Enter the SSH server's IP/Hostname. Port The server's port. Enter a port number. Username The username to authenticate the SSH server. Enter the username. Provide SSH Key The SSH key used to authenticate to the SSH server. 1 Select this radio button. 2 Enter the SSH key. Generate key using password ScaleArc will generate keys and sync them to the server using the password provided, post which all communication with the server will happen using the generated keys.This password is not saved.
1 Select this radio button. 2 Enter your password. Click the Configure HA button to commit the configuration.
Set timeouts
These settings determine the interval before a token can be declared as lost or an HA partner as inactive/dead.
- Click on the Timeout Settings button.
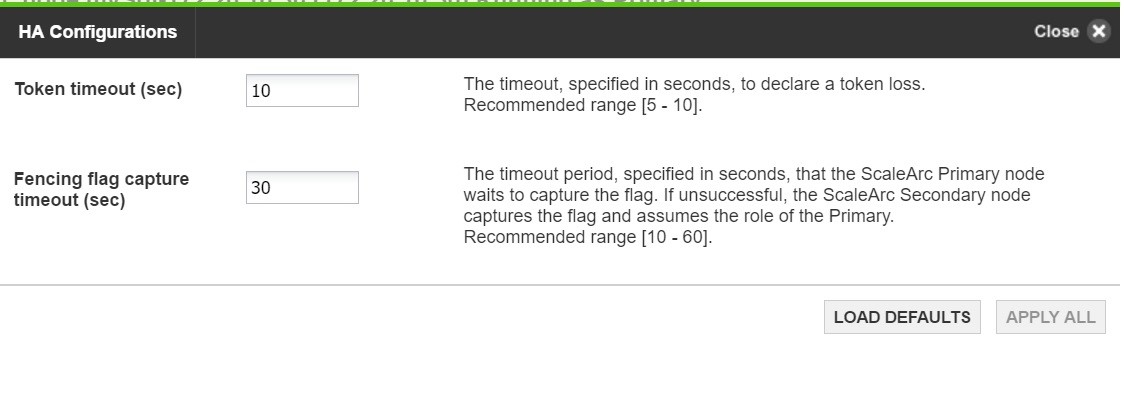
Then, enter the interval as follows:
Field/Button Description User input/Default Token Timeout (milliseconds) Token timeout is the time, in milliseconds, during which the Corosync token is transmitted around the ring. When this timeout expires, the token is declared lost. ScaleArc recommends 10 milliseconds.
Enter a timeout period. Default is 10 milliseconds. Fencing Flag Capture Timeout The maximum amount of time a HA partner waits before it declares the other partner dead and acquires its resources. Enter a time interval. Default is 30 milliseconds.
Restart HA
This action should be initiated only if there are any issues with ScaleArc HA service.
- Click Restart.
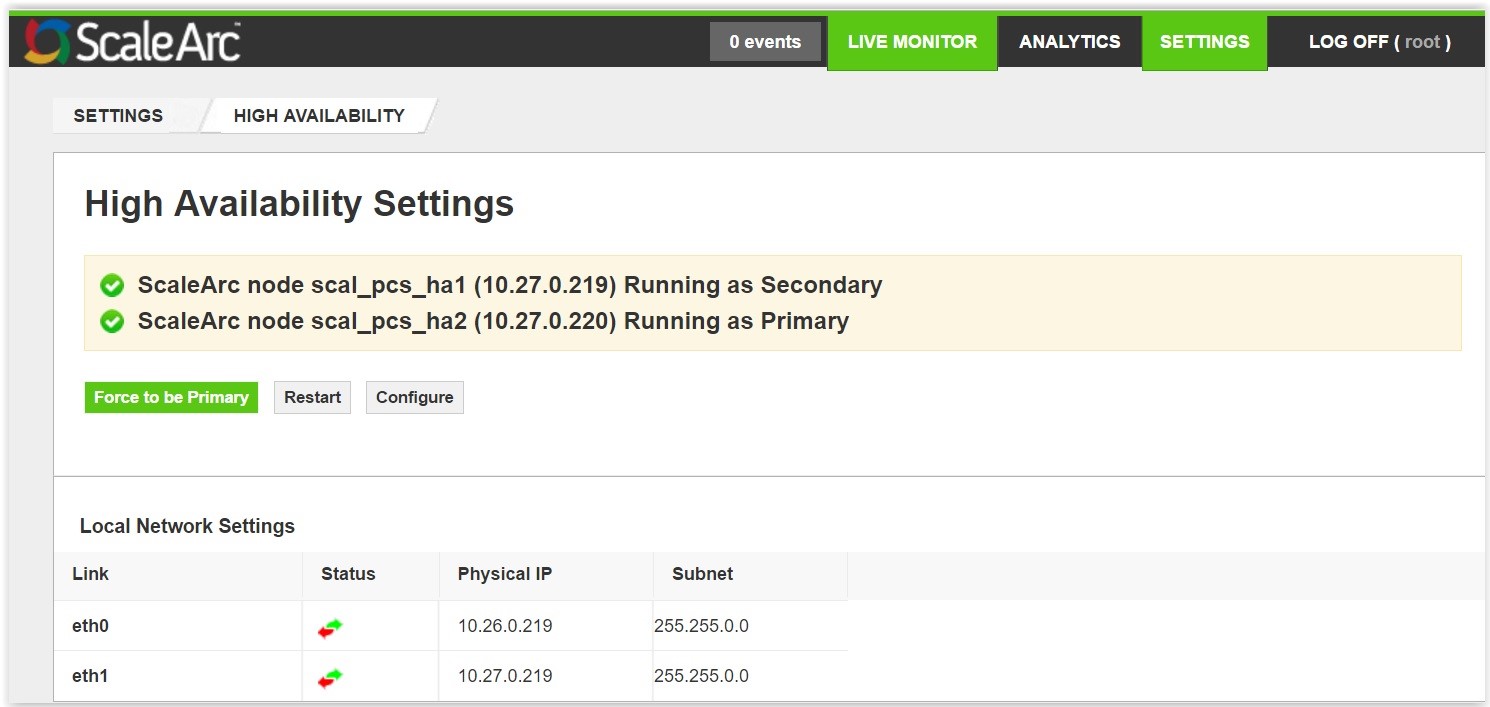
Switch HA roles
Once ScaleArc is in an HA mode, you can perform these actions on the primary:
Delink from secondary. This will perform HA delink operation and both nodes will become standalone. All the configurations post delink will only be available in primary and secondary will have empty configuration.
All VIPs will point to the Primary machine.- Switch to secondary.

You can perform similar actions on the secondary appliance.
- Click Force to be Primary button to switch to primary.
Set up HA in the cloud
You can set up an active-active HA configuration using an external TCP load balancer.
The steps for configuring this setup depend on the cloud provider (MS Azure, and AWS).
Comments