
This section provides details on how to configure a database user that ScaleArc can use to communicate with the database servers assigned to the cluster. ScaleArc uses the configured access credentials, both during the initial cluster configuration process as well as during the continued operation of ScaleArc. ScaleArc performs these tasks with the credentials: collect lists of databases, database users, and user privileges defined in the database server; and monitor the health of individual database servers and that of the replication status between database servers assigned to the same cluster.
You have the option to configure database access with or without Kerberos.
Configure Database Access without Kerberos
Follow these steps:
- On the ScaleArc dashboard, click the Clusters tab > Add Cluster button.
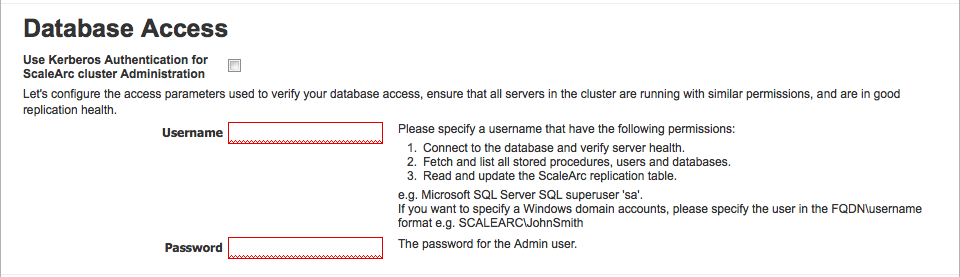
- Locate the Database Access section. This is the second panel on the Create Cluster screen.
Configure the fields as follows:
Field/Button Description Default/User input Username Administrative user for the database server. Refer to the KB article for more information on minimum database user privileges.
Enter the user name. Password Password for the administrative user. Enter the password. Use Kerberos authentication for ScaleArc administration Ensures that the entire cluster is running in a complete, Kerberos-authenticated mode.
Leave this checkbox unselected. Default is unchecked checkbox. Start Cluster After Setup Determines if the cluster automatically goes live, following setup. A selected checkbox results in a live cluster at setup. When deselected, you need to start the cluster manually. Default: Checkbox is pre-selected.
Select/Deselect checkbox.Next, set up SSL or skip this optional step to configure the database servers.
Comments