
Azure SQL Database is Microsoft's cloud-based relational database service that is based on a SQL Server engine. SQL Database delivers predictable performance by dynamic scaling with no downtime. ScaleArc on SQL Database presents sizable performance gains, resiliency, security benefits, and application transparency.
Prerequisites
Before you begin, set up the following:
- You have Microsoft Azure SQL Database installed, configured, and running.
- You have selected the same region for ScaleArc and the primary SQL Database to avoid network latency for the write workload.
- You have enabled geo-replication, where a single logical database is replicated over multiple SQL database servers.
- You have configured the network for SQL Database (make sure Search domain includes your SQL Database domain name, database.windows.net). This is especially important when you upgrade from ScaleArc, version 3.11 to the latest version.
- ScaleArc is joined to Azure AD.
- You have the necessary SSL certificate and keys on hand. SQL Database requires that you configure SSL to complete the setup.
Configure Azure SQL Database
To set up Azure SQL Database follow these steps:
On the ScaleArc dashboard, click the Clusters tab > Add Cluster button.
Complete setting up ScaleArc endpoints and database access.
- Locate Servers on the Create Cluster screen. This is the third panel on the screen.
- Select Cluster for Server Type and Azure SQLDB from the drop down.

- Click Configure Server. Enter the name of the SQL Database server which has the database for which you wish to create a cluster.
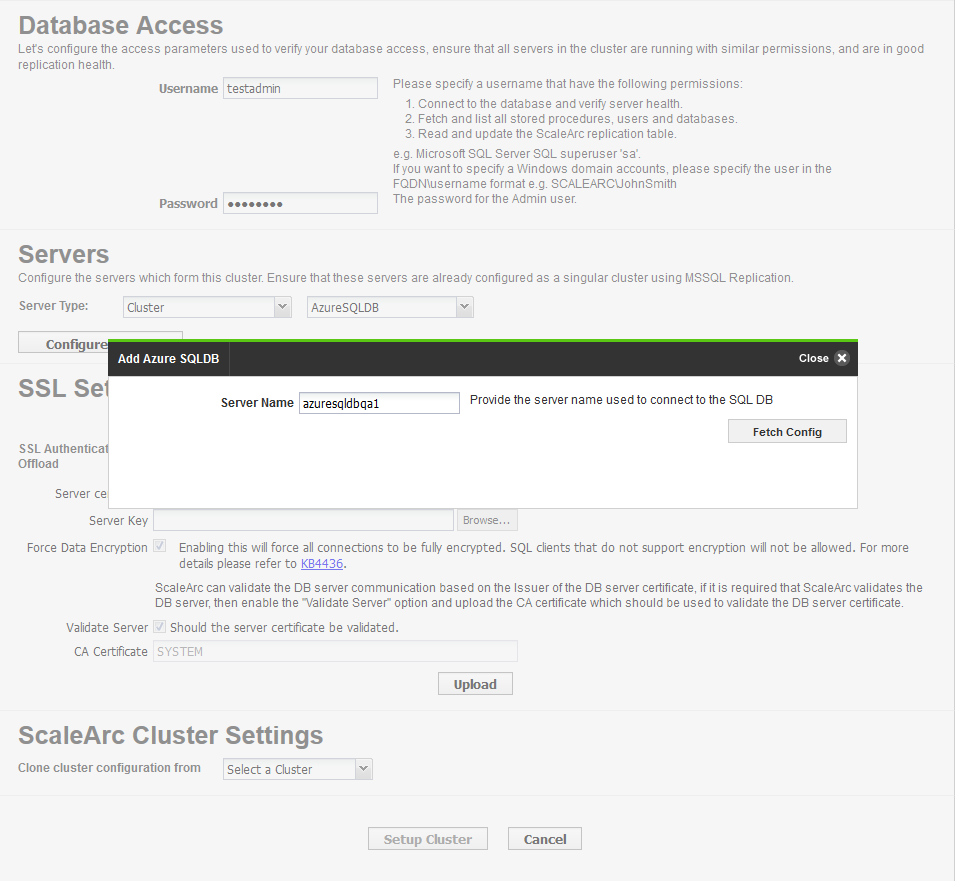
-
Click Fetch Config. This connects to the Azure SQL Database server and fetches all the databases associated with it in an alphabetical order in the drop down menu. The table below displays the SQL servers that are running the replicated database, along with their Azure regions and related information.
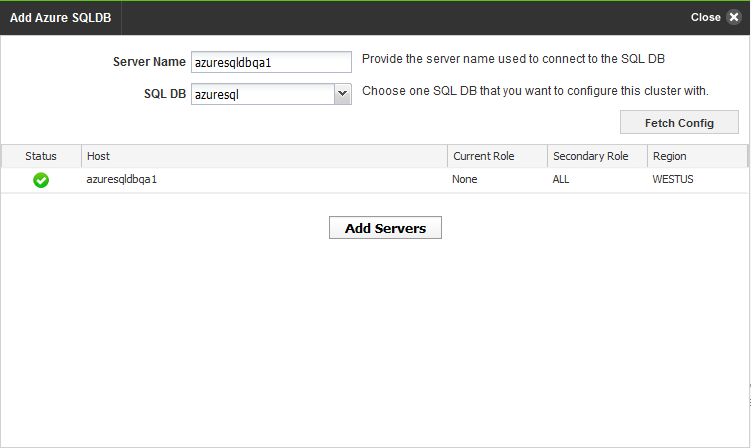
- Click on Add Servers to add the selected servers to the clusters.
- Set up SSL by uploading the SSL certificate and key.
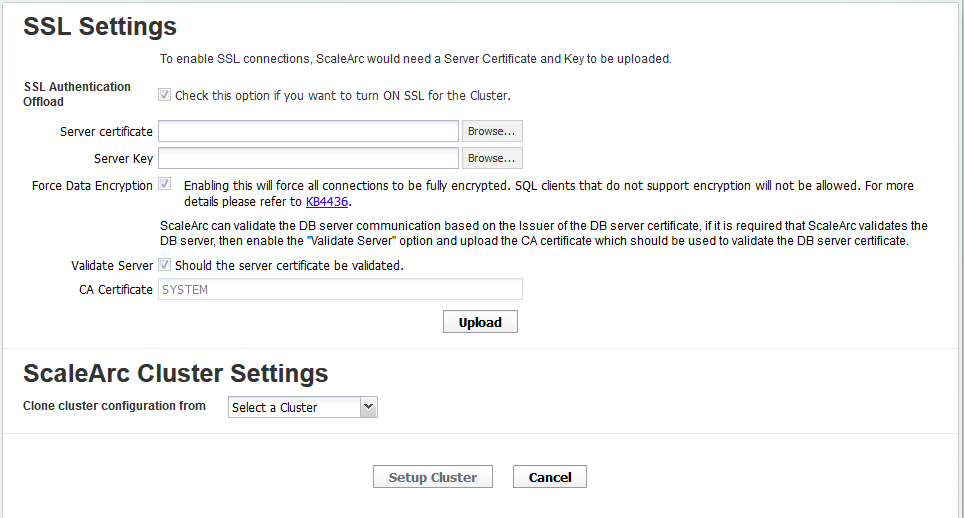
- The Start Cluster After Setup setting determines if the cluster is ON or OFF immediately following a setup.
- Click Setup Cluster to complete the configuration.
- If you have incorrectly configured the settings, you may see an error alert.
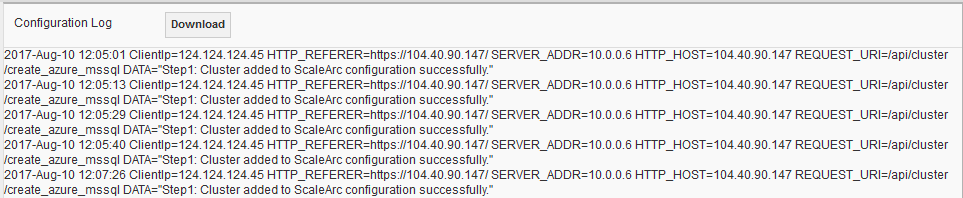
- Click OK. Any error appears in the Configuration log section of the screen. Review the details and address the error to complete the set up. Note that you can also download a copy of the error for your record.
- Click Finish to set up the cluster.
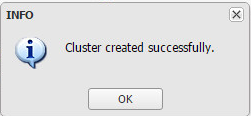
- When completed, the system posts a notification. Note that now ScaleArc Authentication Offload and the Read/Write split option are ON.
- The cluster appears in the control panel of the dashboard. It displays the SQL Database configuration.
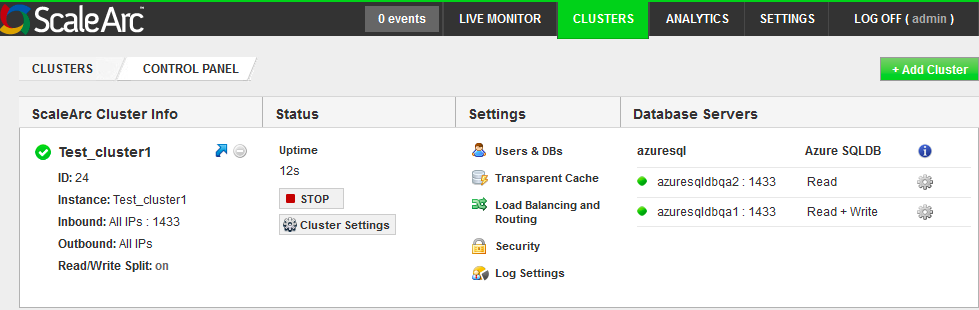
- If you selected the checkbox (its default setting) in Start Cluster After Setup, the cluster's green icon indicates that the cluster is already running. If you deselected this option, the cluster icon is red, indicating that you need to start the cluster. Click START in the second column to run the cluster. The icon turns green. Click STOP to halt the cluster.
Configure for ScaleArc-managed traffic
Make the following changes in order for ScaleArc to manage external traffic.
Set up the firewall rules in Azure SQL Database
Azure SQL Database automatically disallows client connections originating from outside Azure. You can circumvent this by configuring rules to allow external traffic from ScaleArc to Azure SQL Database.
- Whitelist the ScaleArc public address for receiving traffic from the ScaleArc VM.
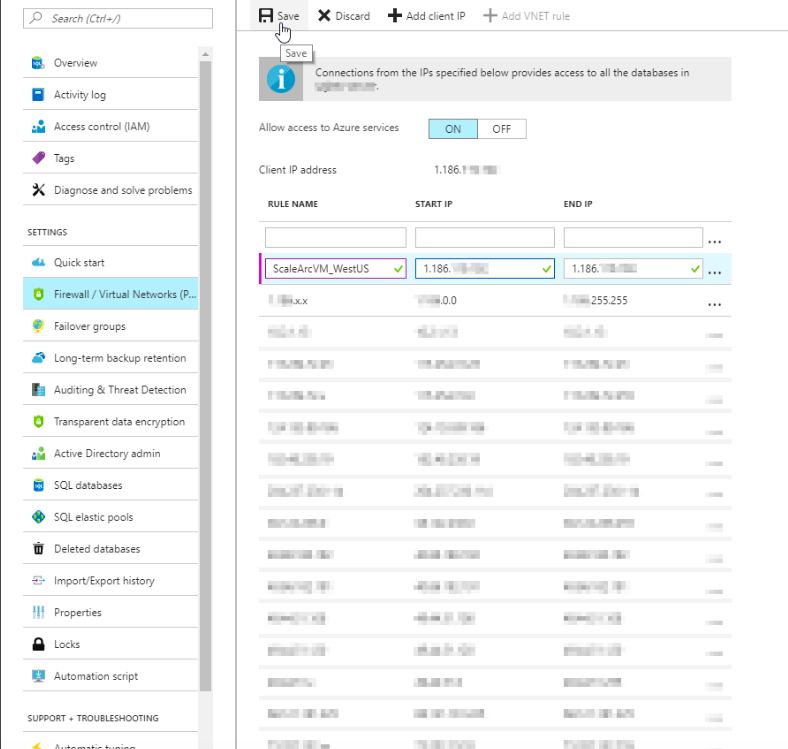
- Add the ScaleArc IP address for each of the servers in the cluster you created.
Define rules on the Azure VM for the cluster
These steps help you configure external rules on the Azure VM for ScaleArc. Once you have created a ScaleArc cluster, use the following steps to open an inbound port on the Azure VM.
- Go to the Azure Portal and under the VM's NSG, click on Inbound Security rules.
- Click Add.
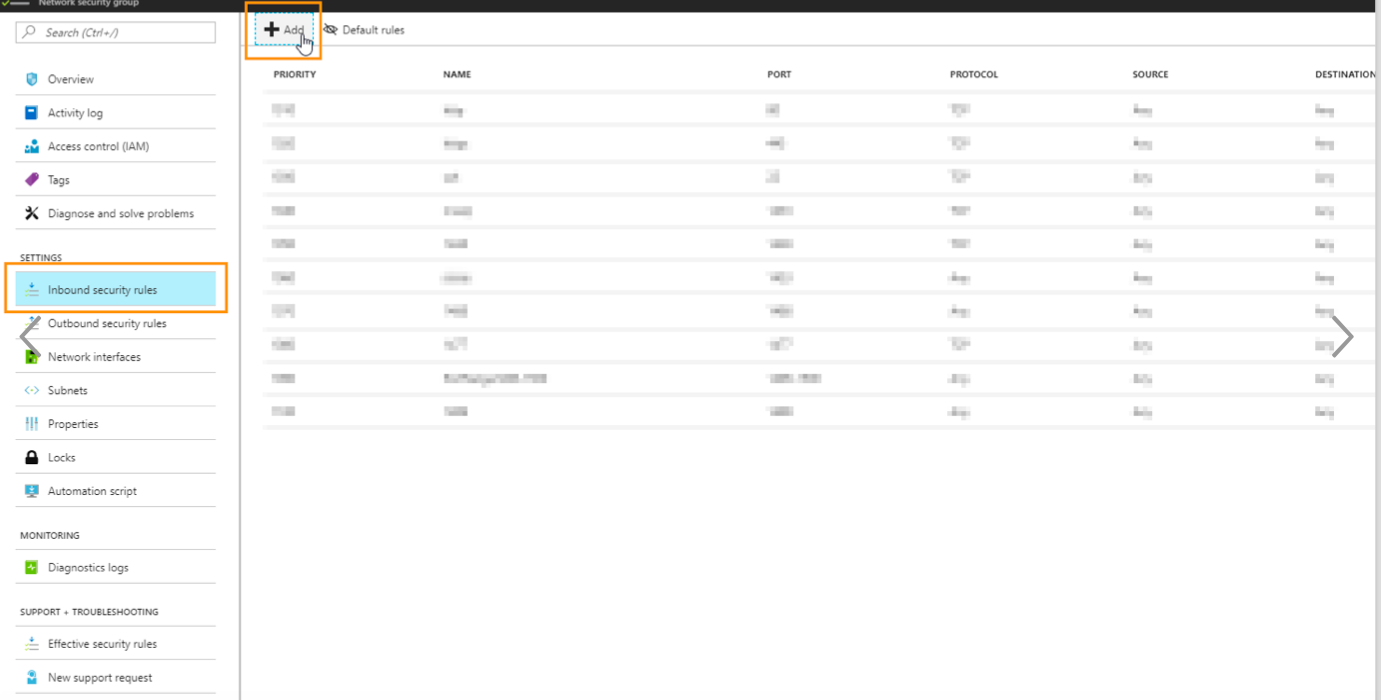
- Click Advanced to add the Inbound security rules.

Enter the details as shown. Click OK when done.
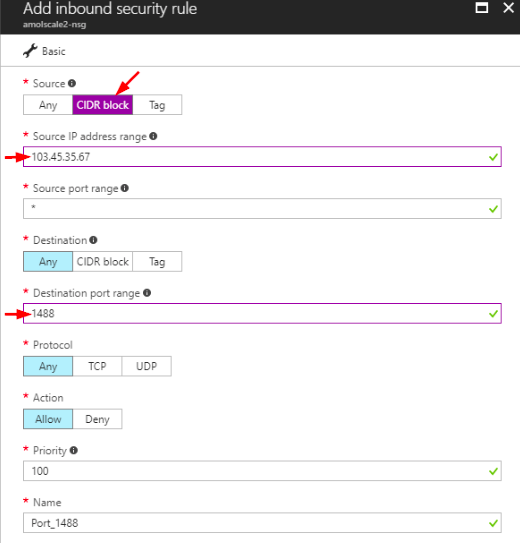
Field Description User input Source Any: Accepts traffic from all client IP addresses. CIDR: Specify a single or a block of client IP addresses. Tag: A user-defined label for a single or a range of client IP addresses. Select the CIDR block option. Source IP address range When specified, the database only accepts traffic from one or more specified client IP addresses and blocks out the rest. If you wish to allow another client IP for ScaleArc that is not within this range, you need to create another rule for it. Specify a ScaleArc IP address or specify a CIDR range.
Do not skip this step.Destination port range The destination port number. This is the inbound port number of the ScaleArc cluster that you created. Enter the port number for the ScaleArc cluster.
Comments